Since the last blog I have been working pretty much full time so it has been hard to fit in all the normal day to day bits as well blogging, but luckily things are now back to normal and back to part time work so I get more time to explore games and try them out with the children.
We have been having a lot of fun with the latest games and Boom! (will explain later) is everyone’s favourite game, we have to play it at least twice a day!
Isabel now gets spelling homework each week. It is the usual set up with a set of words and then they have to look, say, cover, write. Isabel actually enjoys doing them but I thought there must be a way of making them a bit more exciting so I have adapted some games to come up with some more exciting ways to practise spellings.
Game 1: Snowy spellings
Resources: Coloured tray (I used tuff tray but an Ikea drawer, or large planter tray would work just as well), flour, sieve, magnetic letters
This one is great fun, just don’t do what I did & let them go crazy in the flour afterwards as Isabel & Megan decided to do snow angels and literally ended up looking like snowmen!
Sort out the letters so you have all the letters available for the words you want to make. Say the word your child has to spell. They find the letters and put them in a line, then shake flour through sieve over the top of them. Carefully lift the letters and you are left with the outline of the word. Repeat for all the spellings. Megan really wanted to join in so I asked her to find all the letters in her name from those left in the pot. She amazed me as she found every letter and put them in the right order. When I Isabel had finished all her spellings Megan made an outline of her name too.


Game 2: Straw spellings
Resources: All the letters needed for the spellings written on paper and cut into shapes (I chose triangle as it was easy to cut out!) A piece of card with a large rectangle box drawn in the middle, a straw.
A friend tagged me in a similar activity on Facebook. They were using this to order numbers and I thought it would make a fun way to practise spellings. It can also be used to order numbers.
Place the individual letters around the card. Say a word. Your child then uses the straw to pick up each letter in the word by sucking in air and moving it into the rectangle on the card. Repeat for each word. Megan was keen to do this so I used her name, she couldn’t suck well enough to lift the paper but was happy to sort the letters by hand.

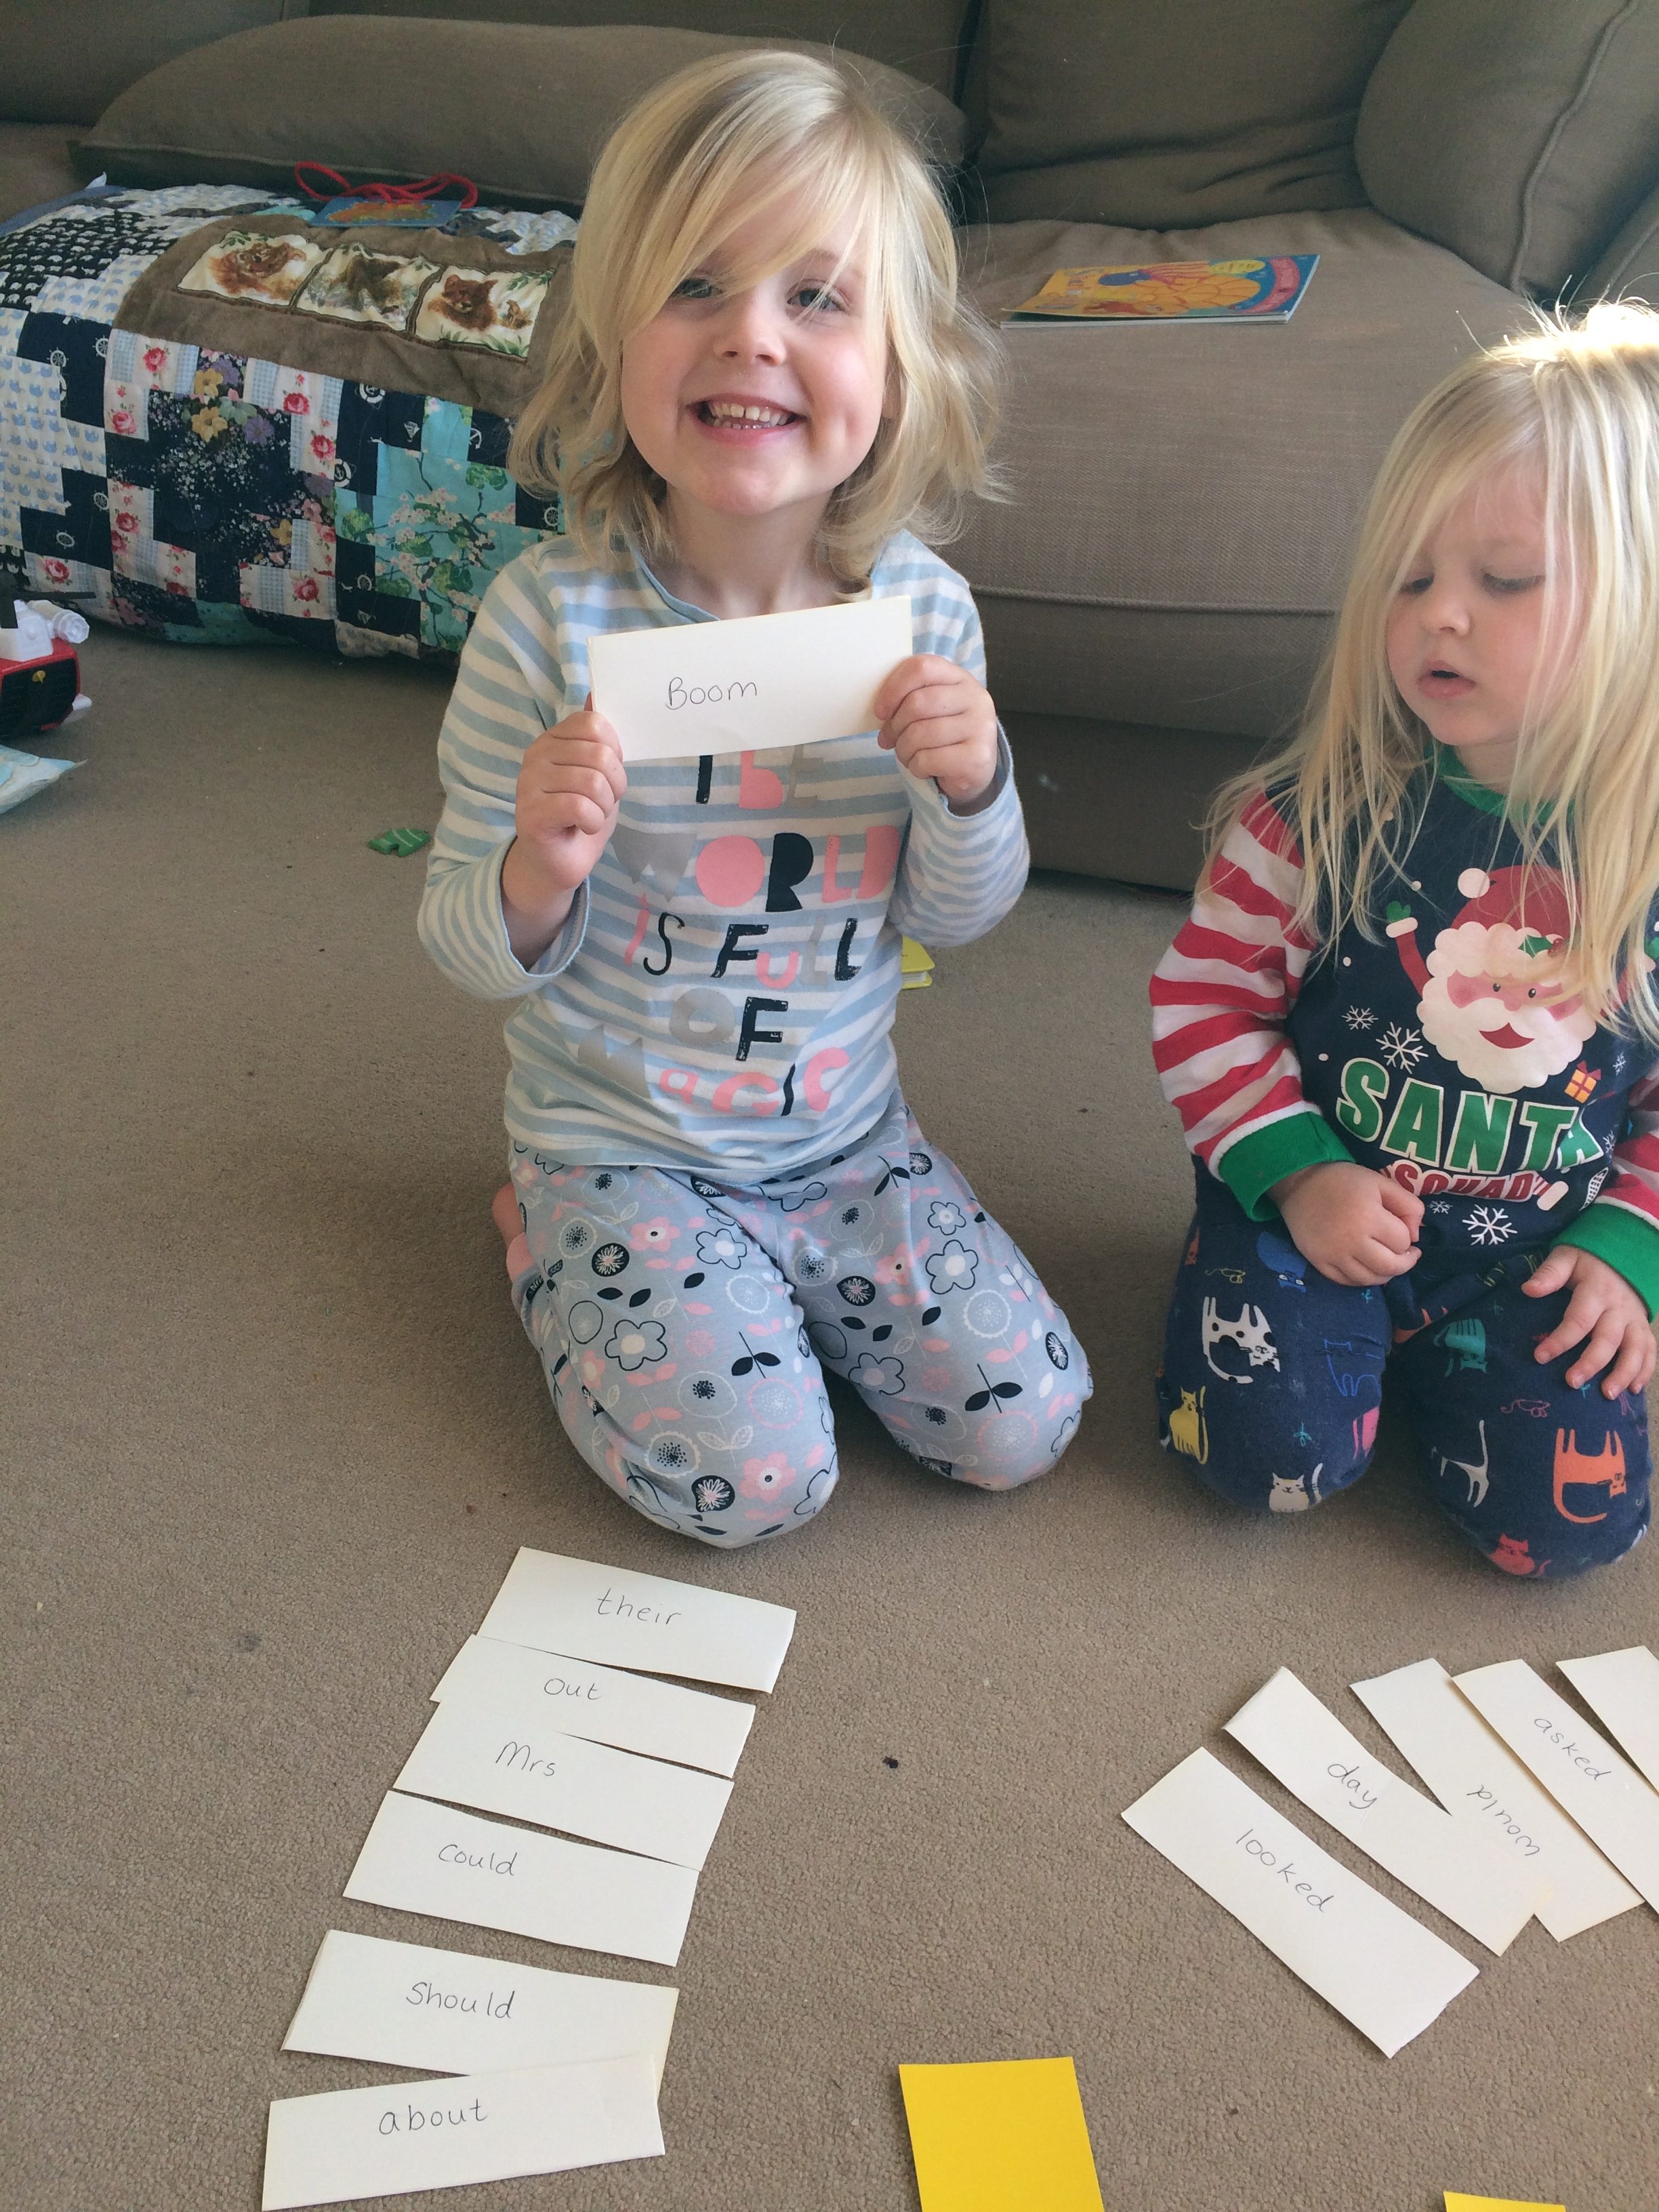
Game 3: Boom!
Resources: Card, marker pen, scissors
The most exciting game we have played for ages and it is so simple. Write words your child needs to practice onto a set of cards, one word per card. I used the phase 5 tricky words but you can use spellings or alternatively individual sounds. It also can be used for number recognition. On two of the cards write the word Boom! Then turn over all the cards and take it in turns to pick a card. If you read it correctly you get to keep the card. If you pick up the word Boom! then you must return all your cards to the middle. The winner is the person with the most cards at the end. Even Megan loves playing this and she can’t read the words Isabel reads them for her so it is a win win situation as Isabel does double the reading and Megan gets to join in.

More Phonics Games
Game 4: Rhyming dominoes
Resources: lollypop sticks, a marker pen
Divide each lollypop stick in two with a line in the centre. On the right hand side of the first stick write a word e.g. dog, then on the left hand side of the next stick write the rhyming word e.g. log. Continue with different rhyming words for the number of sticks you have, then for the last stick write the rhyming word on the left hand side of the first stick. Then divide the sticks between the number of players you have, youngest player goes first. Place a stick down then play as dominoes and match the rhyming words until all the sticks have been played. You can also use this game to practise initial sounds or matching alternative digraphs.


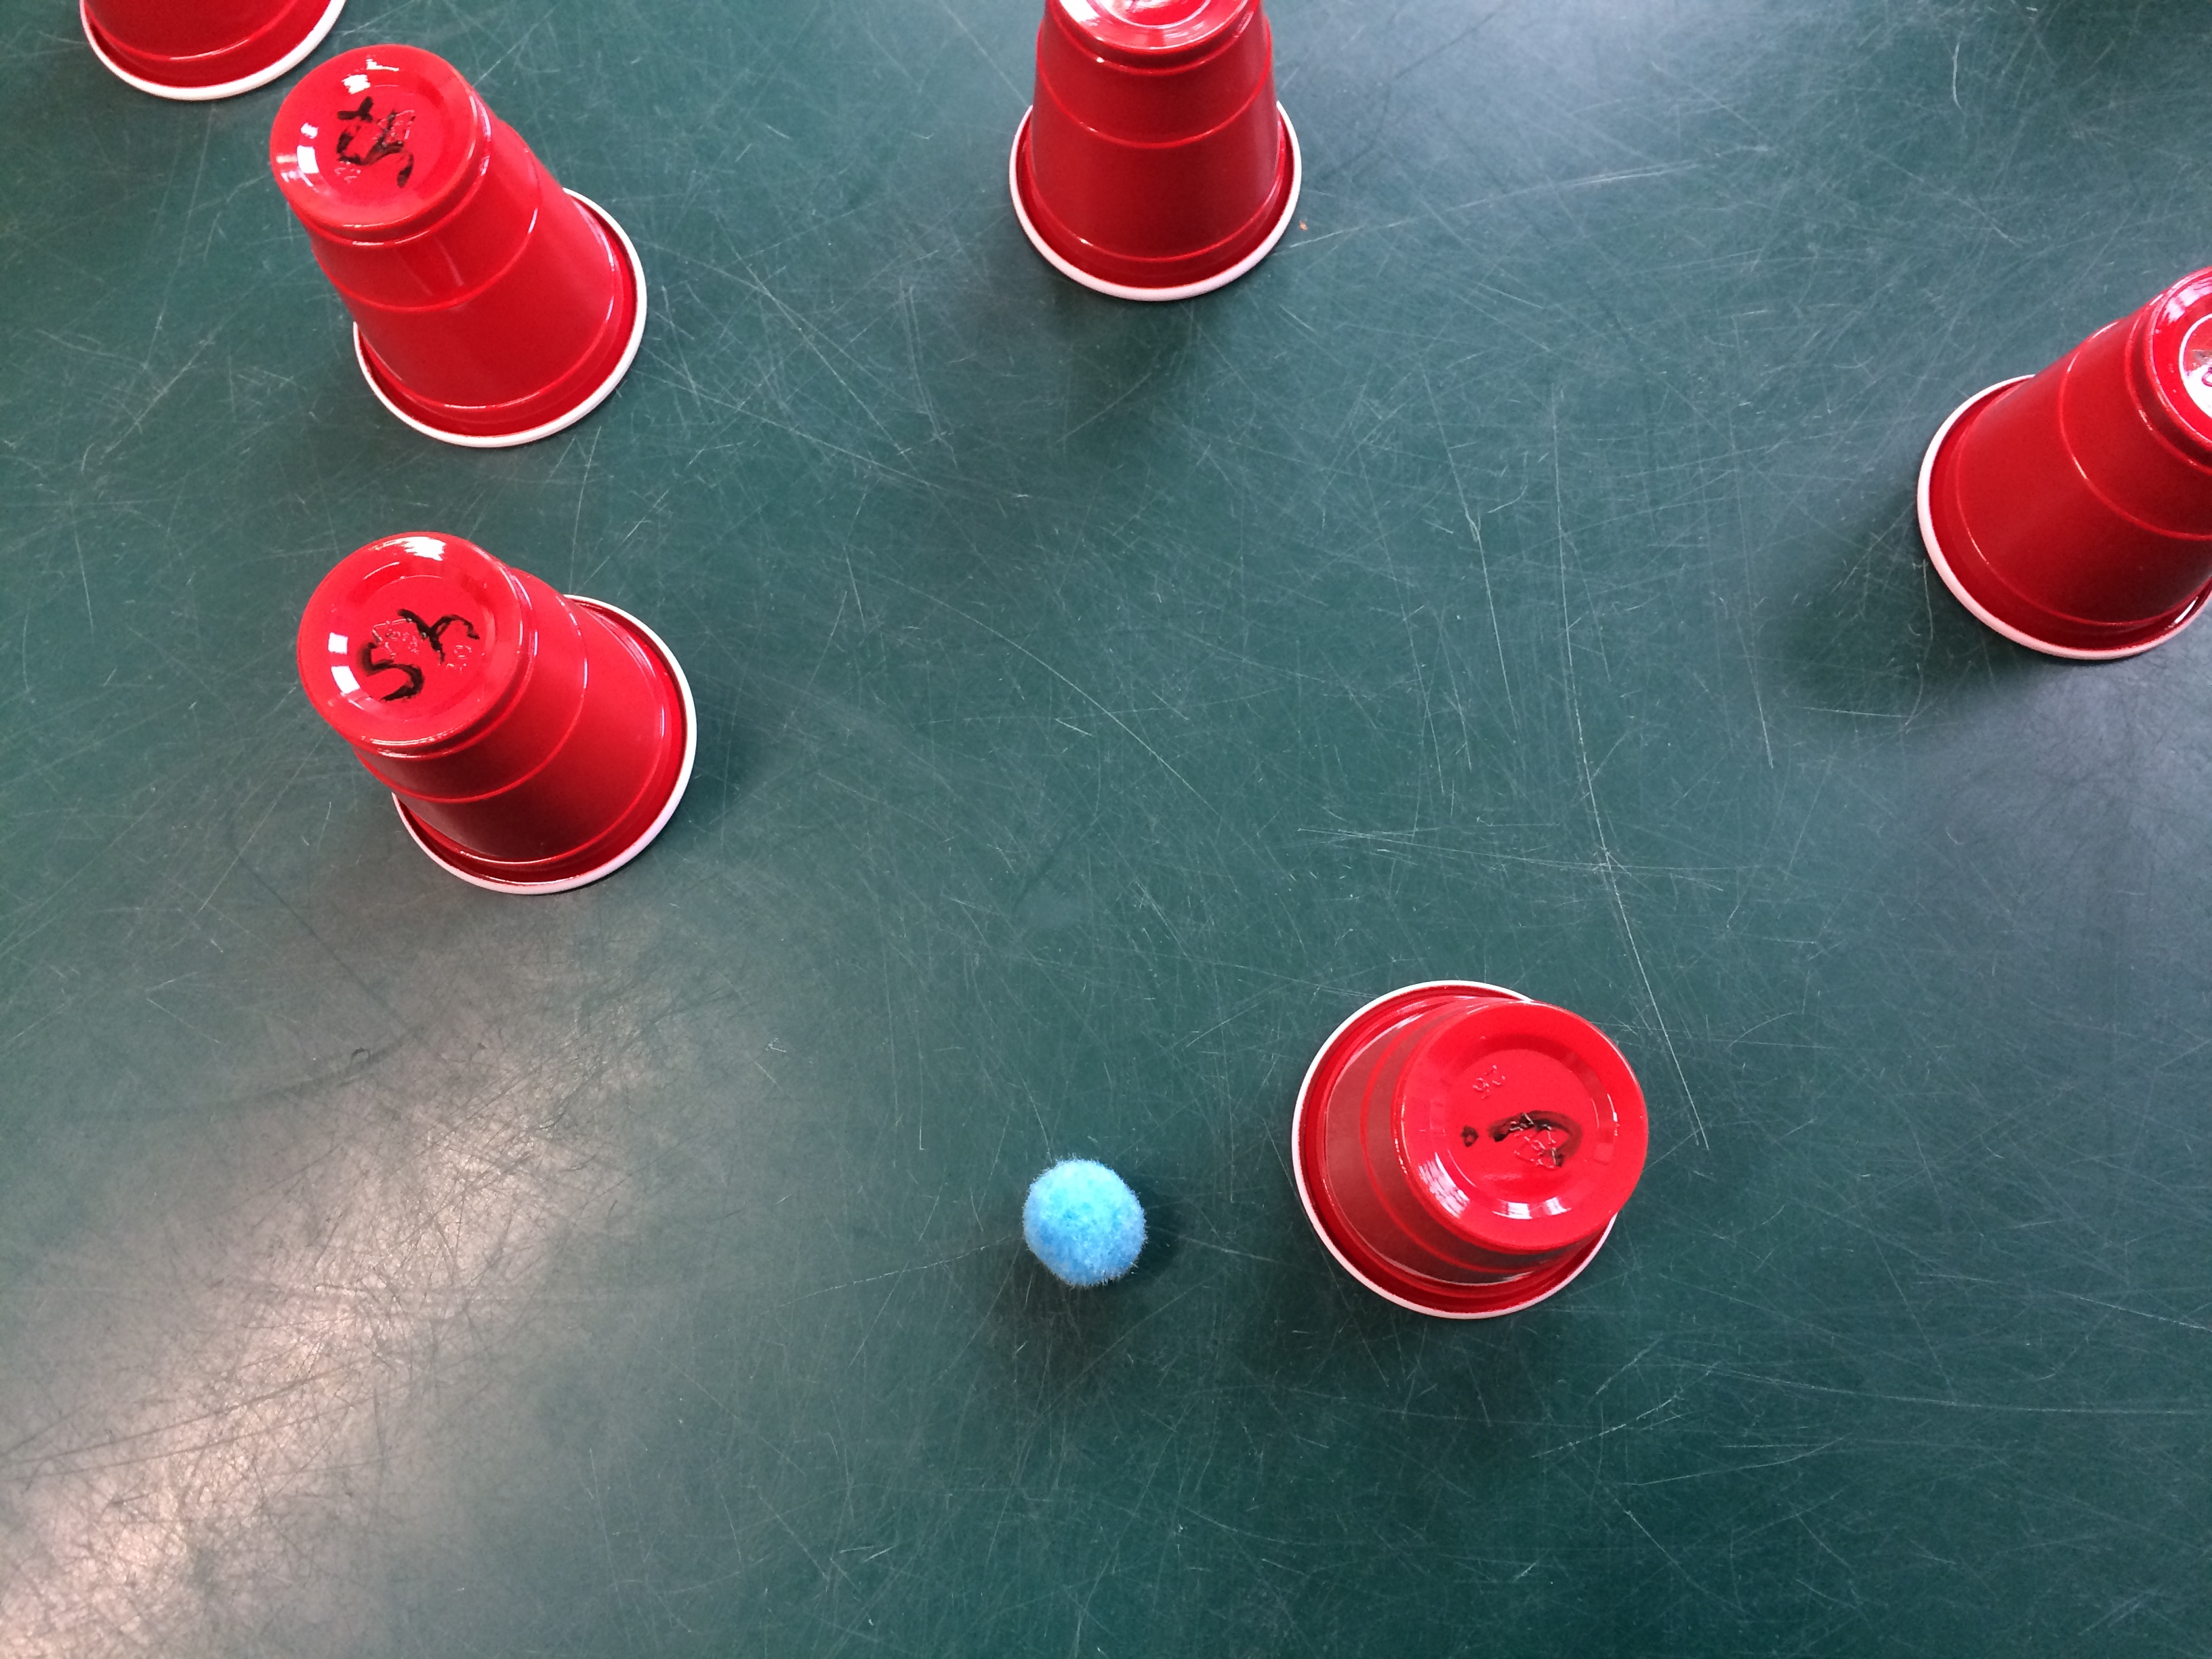
Game 5: Sound cups
Resources: Paper cups, marker pen, pom poms
On the bottom of each cup write the sounds you would like your child to practise. Ensure you include ones they can read as well as ones they are uncertain of. Place the cups upside down on the floor or in a tray. Underneath a few of the cups place a pom pom. Children then take it in turns to pick a cup, they need to say the sound and if they get it correct they can look underneath. If the cup is hiding a pom pom they may keep the pom pom. Game continues until all the sounds have been read. The player with the most pom poms at the end is the winner.
I saw this game on pintrest and thought it would be a good one to play with my class, they absolutely loved it and have asked to play it a number of times since.

Game 6: Races
Resources: A baster (I found mine cheap in Wilko), rolled up tissue paper/ tinfoil, a tray or carpet
This is really a finger gym game as it takes a lot of muscle to make the baster blow enough air to move the tissue paper, but it can be made into a phonics or maths game too.
Roll the tissue paper/ tin foil into small balls. Make a start line and a finish line and get the children to move the balls by blowing air through the baster. First to finish line wins. Once they are used to this you can write letters in chalk on a tray and ask the children to find a particular letter sound. They could have a word written out and they have to make the ball touch each letter in the correct order, or practise tricky words by having a selection written down and then say a word and they need to make the ball touch the word called.

I hope you enjoy these games as much as we have. Let me know if you have any success with them.
Sophie 🙂